Team:University College London/LabBook/Week15
From 2012.igem.org


Contents |
15.1
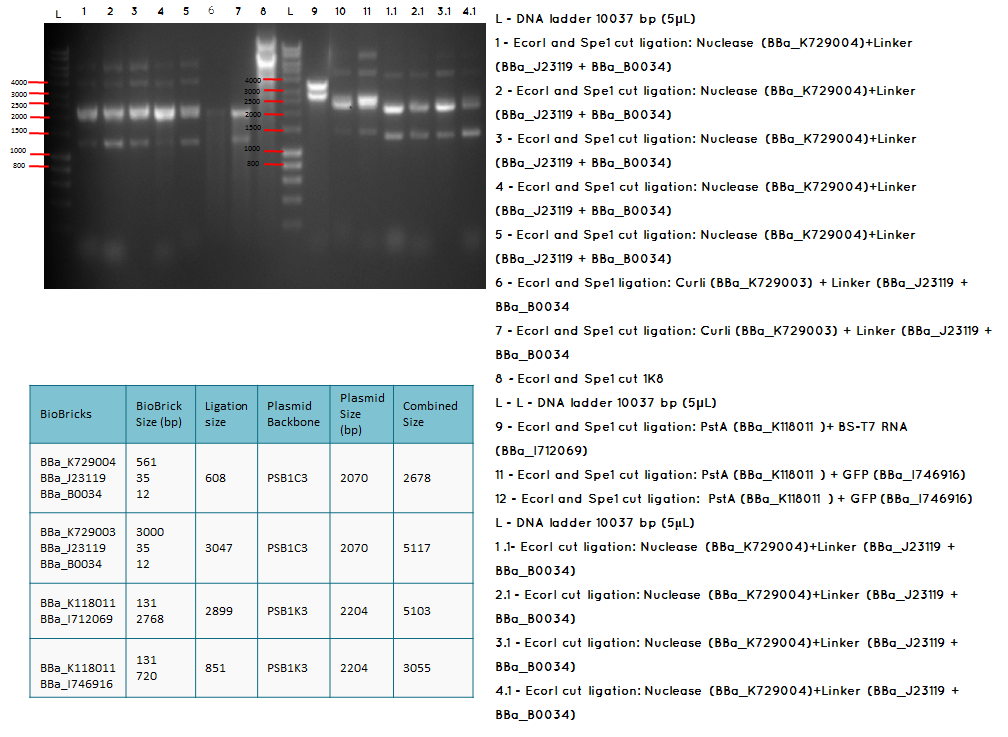
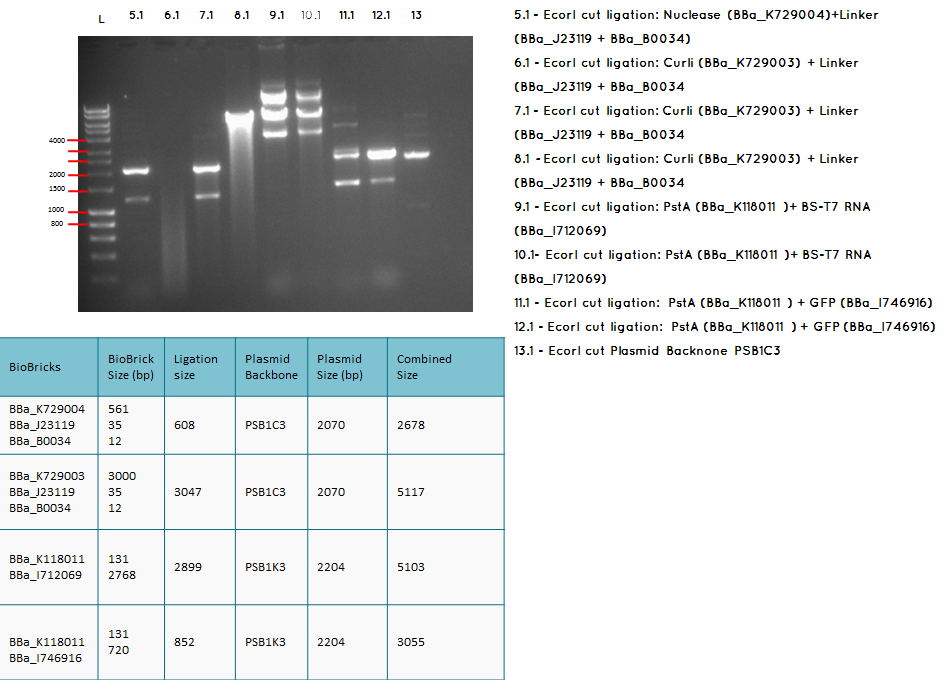
Moday (17.09.12) 3A assembly
Aim – Start 3A assembly to ligate:
- the first (BBa_K729004 and plasmid backbone PSB1C3 ) and second ( BBa_J23119 +BBa_0034) construct
- the first (BBa_K729003 and plasmid backbone PSB1C3 ) and second ( BBa_J23119 +BBa_0034) construct
- the first (plasmid backbone PSB1K3 and BBa_K118011 ) and second ( BBA_I746916 and plasmid backbone PSB1K3) construct
- the first (plasmid backbone PSB1K3 and BBa_K118011 ) and second ( BBA_I712069 plasmid backbone PSB1K3) construct
- pstA promoter (BBA_I719005) and the GFP (BBA_I712069)
- the Biobricks BBa_I746909 and BBa_K729007 to generate a Biobrick that contains pcstA-T7RNAP-pT7-GFP-TT
Conclusion: The bands that we obtained on the gel did not correspond to the sizes we were expecting. For most of the samples we could clearly see a band at around 2000 which most probably is the backbone. These confusing results may be due to mistakes during the ligation or the enzyme digestion. Contamination is another possible reason for these results.

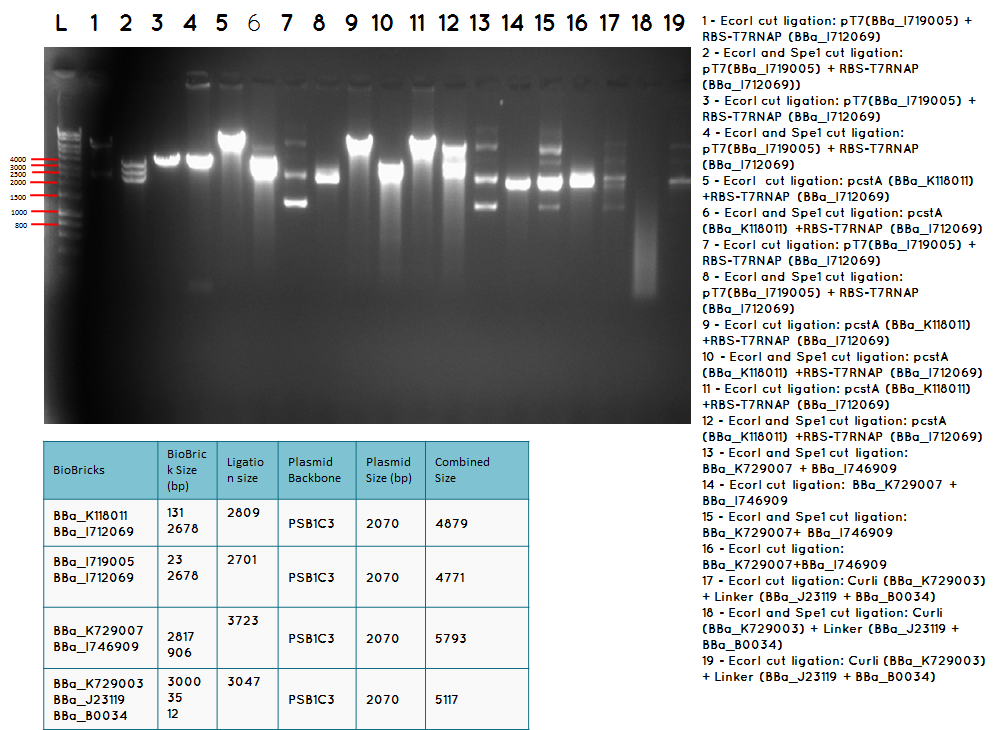
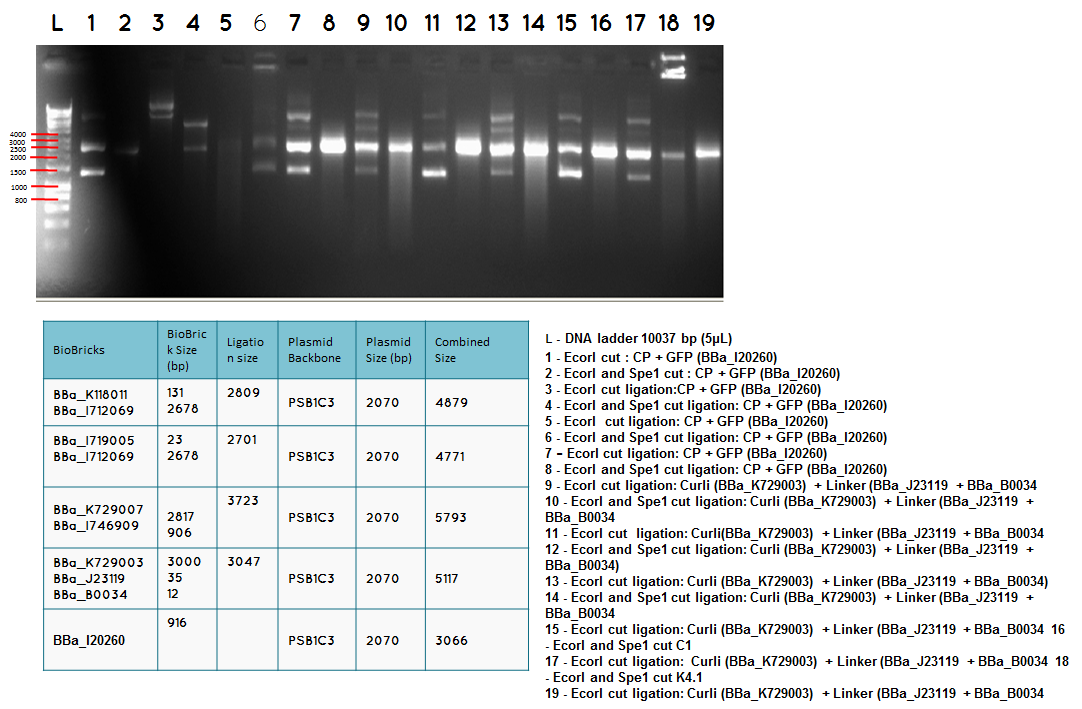
15.2
Conclusion: We have obtained the expected sizes on for the pcstA (BBa_K118011) +RBS-T7RNAP (BBa_I712069) ligation.

15.3
Tuesday (18.09.12)
Aim – We would like to ligate BBa_I746909 to BBa_K729007 to obtain the following construct pCstA+RBS+T7RNAP+pT7+RBS+GFP+TT
Step 1 We minipreped the successful ligation of the pcstA (BBa_K118011) +RBS-T7RNAP (BBa_I712069) ligation which is our biobrick BBa_K729007
Step 2 Ligation was performed using the Biobricks BBa_I746909 and BBa_K729007 to generate a Biobrick that contains pcstA-T7RNAP-pT7-GFP-TT.
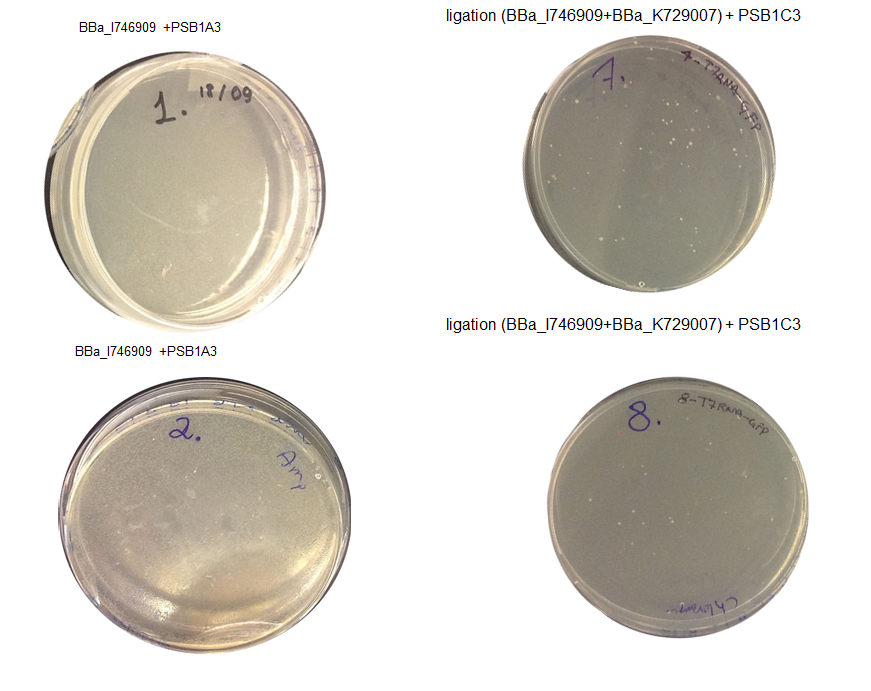
Step 3 Transformation – we plated 4 plates; plate 1 and 2 were with the transformed BBa_I746909 biobrick and plate 3 and 4 were transformed with our ligation (BBa_I746909+BBa_K729007). We are going to incubate over night at 37C and colonies picking the next day.
Wednesday (19.09.12)
Aim 1 – Check the result of transformation. We expect to see growth on plates with transformed biobricks and ligations.
Results - The table below indicates that there was growth on all of the plates
Conclusion : The transformations have been successful. Colonies will be picked and inoculated into LB media for overnight culture
Step 2 - Inoculating Colonies into a Selective Broth:: Add Yul of antibiotic to reach desired antibiotic concentration.
(For Ampicillin this is 50ug/ml, For Kanamycin it is 25ug/ml, for Tetracycline it is 15ug/ml, and for Chloramphenicol it is 25ug/ml)
Step 4 – Selecting a Colony: Select a clear, isolated colony and using an inoculation hoop scoop up a colony onto the tip. Deposit in the falcon tube
Step 5 - Culture: Culture your falcon tubes overnight at a temperature of 37 oC. Leave for no longer than 16 hours.
Step 2 – Inoculating Colonies into a Selective Broth: The table below indicates the volume of broth and the concentration of antibiotic required for each BioBrick.
Step 2 – Inoculating Colonies into a Selective Broth. We had colonies on all the plates. We picked we picked 2 colonies from plates 1 and 2 and 4 colonies from plate 3 and 4. We grow all 12 colonies overnight.The table below indicates the volume of broth and the concentration of antibiotic required.
| Plate | Samples | Volume Inoculated | Colony Formation |
|---|---|---|---|
| 1 | Biobrick BBa_I746909 | 10ul | Yes |
| 2 | Biobrick BBa_I746909 | 90uL | Yes |
| 3 | Ligation BBa_I746909+BBa_K729007 | 10ul | Yes |
| 4 | Ligation BBa_I746909+BBa_K729007 | 90uL | Yes |
 "
"
