Contents |
Purification of Biobricked LovTap, SEAP and TNFR
pcr purification kit from machery nigel was used.
Restriction digest of pCDNA3 (-), Lovtap, SEAP and TNFR
Team:EPF-Lausanne/Protocol/RestrctionDigest
SEAP and TNFR were cut w/ EcoRI and PstI
LovTap was digested with NheI and KpnI
PcDNA3(-) was cut with NheI and KpnI
Ligations
LovTap was ligated with pcDNA3(-)
SEAP was ligated with PGL
Transformations
To create a stock of useable plasmid for further cloning we transformed with
- PCEP4
- pcDNA3.1(-)
One more readout for the melanopsin channel experiments was transformed.
PGL-SEAP
And so was our biobricked lovtap.
PcDNA3(-) - Lovtap
Protocol: E.Coli Transformation
- Thaw the competent E.coli (DH5alpha) cells on ice (not in hands!)
- As soon as it is thawed, add 50µl of the cells to the DNA (~50-100 ng of pure plasmid, or some 2 µl usually)
- Let it rest on ice for 20-30 min. Meanwhile, put agar plate (with correct antibiotic) at 37°C for prewarming.
- Put the tube with DNA+E.coli at 42°C for 45 sec - 1 min (heat shock)
- Add 400 µl of LB broth and place at 37°C for 20-30 min (shaking)
- Spread the cells on the prewarmed plate (and let it dry)
- Incubate the plate upside-down at 37°C for ~14-15 hours (leaving it more than 16h decreases the plasmid quality)
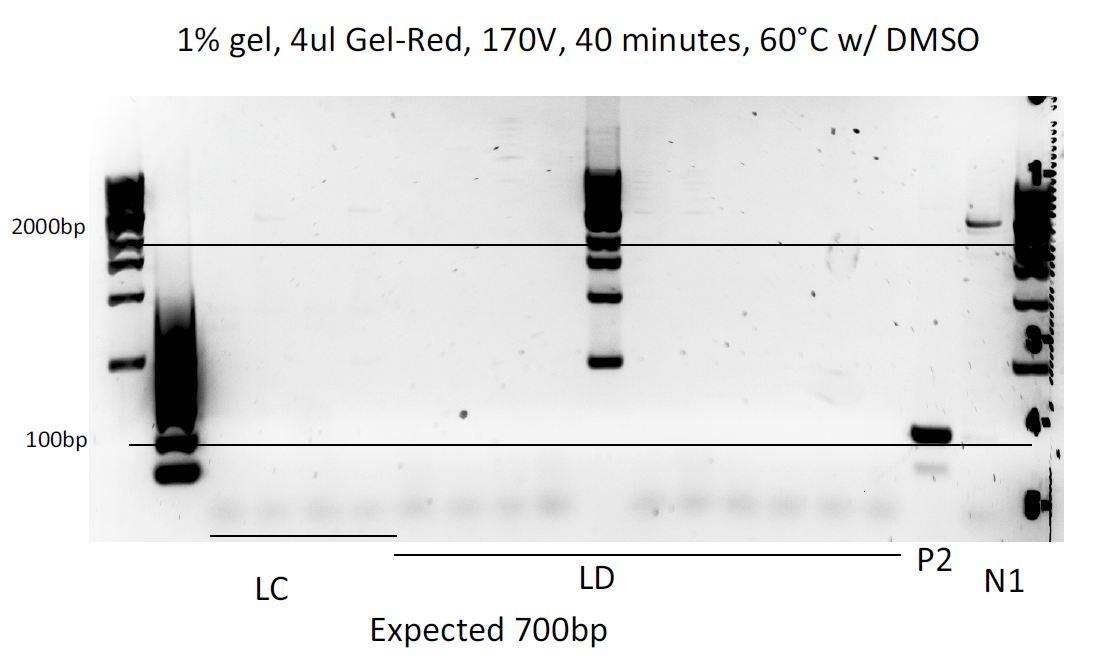
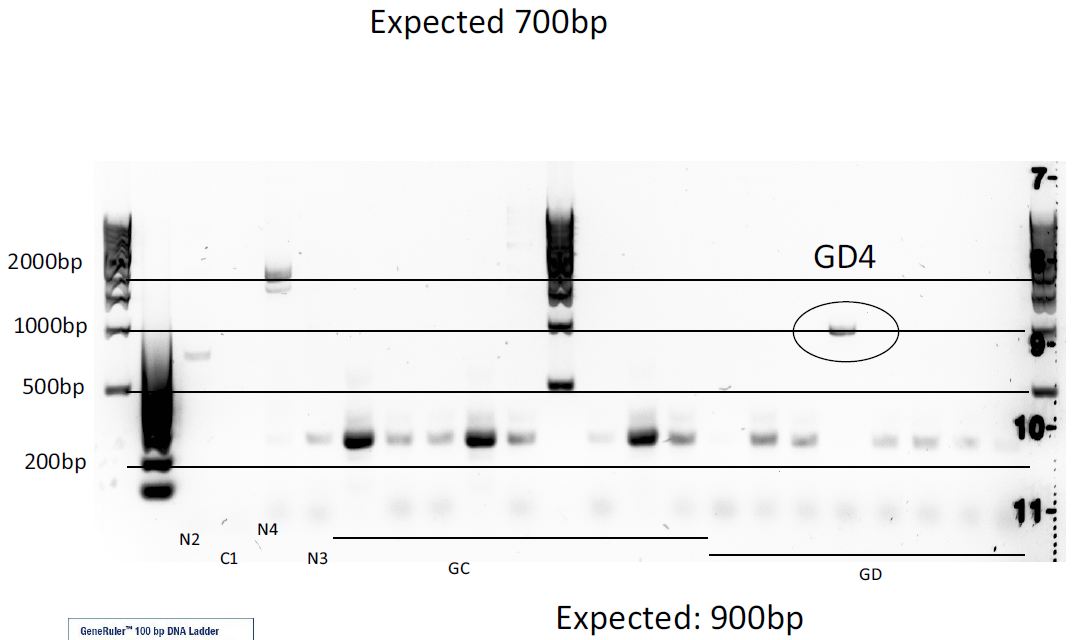
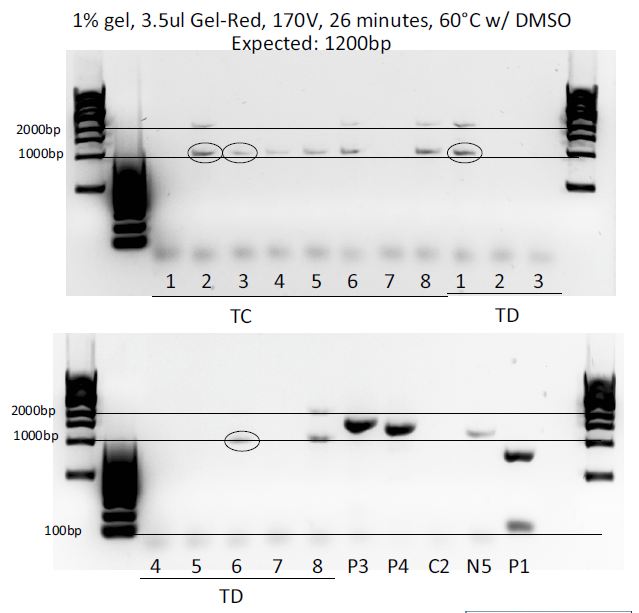
Colony PCRs: pMP-LovTAP, pGL4.30-EGFP, pGL4.30-TNFR
Colony PCR of the 3 ligations (each in a dirty (D) and clean (C) way, meaning more or less purified) to test which colonies integrated the right fragment and contain the plasmid we want.
Protocol: PCR
PCR is a reaction that makes it possible (and relatively easy) to amplify
a certain region of DNA. The first step is the selection of that region
(and the design of the relevant primers). Primer design can be done by hand, or by
using our Primer Design Helper. Once
done, order the primers (in our case, we ordered from them [http://www.idtdna.com/ IDT]).
When you've received the primers, prepare them and make sure you've got your PCR kit (we used the "Phusion® High-Fidelity DNA Polymerase"). Start preparing your master mix, the composition for one tube is:
1X Mastermix 20μl reaction, add in this order
| Reagent | Volume [μl] |
|---|---|
| Water | Complete to total volume of 20μl |
| HF-Buffer (5x) | 4 |
| DMSO (optional) | 0.6 |
| dNTPs | 0.4 |
| Forward primer (50μM) | 0.2 |
| Reverse primer (50μM) | 0.2 |
| Template (10ng/μl) | 0.5 |
| Phusion HF polymerase | 0.2 |
Prepare one or two extra tubes-worth of reagent (you'll use some liquid on the walls of your tips).
Once you've finished, you should run the resulting products on a gel to check if everything went as planned.
Tips
- Thaw the HF-Buffer, DMSO and dNTPs before making the mastermix.
- Avoid taking the Phusion-HF polymerase out of the freezer (only take it out briefly when you need to add it).
- If the reactions have different primers and/or template, add the polymerase right after the dNTPs, split the mastermix and add the rest.
- Don't forget positive and negative controls
- Primers should have similar Tms (less than 5°C).
- Primer Tm calculation is a less exact science than it should be (just test several tools and compare their results). If you're not sure what the correct Tm is, consider using a gradient PCR.
- Avoid primers with strong secondary structures.
- PCR can introduce mutations. Don't forget to sequence your final product (this could be your final plasmid): you really don't want to lose a few weeks because of a "corrupt" plasmid.
Results:
- Comments
Insert comments about what happened.
 "
"


